In this tutorial, we’ll learn how to use AI technology to replace someone’s face in a photo with your own. The process is simple and doesn’t require any advanced photoshop skills.
To start, you’ll need to train the AI on what your face looks like. This can be done easily at Astria.ai for $1.50. Simply feed the AI 10-30 photos of yourself, making sure to follow the recommended guidelines for the best results. Next, download the ckpt file, which contains all the information about your face.
Next, we’ll use a free download for Mac computers called Diffusion Bee (for Windows, you can use Automatic 1111). In Diffusion Bee, head to the Image to Image tab and feed it the image of your face you want to replace. To get the best results, it’s recommended to zoom in on the face you want to replace and make sure to select the face in a 1 to 1 ratio.
After copying and pasting the face into a new layer in Photoshop (or any photo editing program), save the new image as a PNG file, next, drop the image into Diffusion Bee and specify the area you want to replace (in this case, the face). The most tedious part of the process is specifying the face, as Diffusion Bee currently only has one brush size. (Although, if you shrink the program window, it allows you to select more at one time.)
Once the area is specified, you’ll need to specify the model you’re using in the settings. This would be the ckpt file you downloaded earlier. In Diffusion Bee, head to settings, click Add New Model and specify the file. Go back to Image to Image and make sure the options are correct for image strength (I recommend 30), the number of images (15), guidance skill (15), and steps (70).
Finally, make sure to choose the custom model you just added in the settings and enable the negative prompt to specify things you don’t want in the image, such as low resolution. You can create as many of these images as you want until you find the best one.
Once you’ve found the best image, save it and drop it into the Photoshop document. Copy the image and paste it into the photo you want to change. Move the layer until it fits, and you’re done!
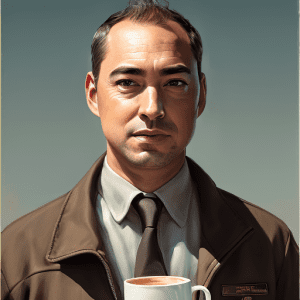
In conclusion, replacing someone’s face in a photo with your own is a simple process that can be done using AI technology. By following this tutorial, you’ll be able to create images that look like they were done by a professional graphic designer.